
Flash Latest OpenTX
If you decided to flash EdgeTX, you don’t need to worry about OpenTX and just can skip this part. But if you still want to stick with OpenTX, you need to update OpenTX to the latest version following these steps.
If your OpenTX version is older than 2.3.12, then you will need to flash the latest OpenTX.
Updating OpenTX firmware on your radio allows you to flash the ELRS firmware to the transmitter module from the radio, and get CRSFShot working.
Here is a step by step guide on how to flash OpenTX. Anyway I will try to summarize the steps here.
Get the latest OpenTX Companion, you will need 2.3.12 or newer (just get the latest one): http://www.open-tx.org/downloads
Install OpenTx Companion on your computer, and run it.
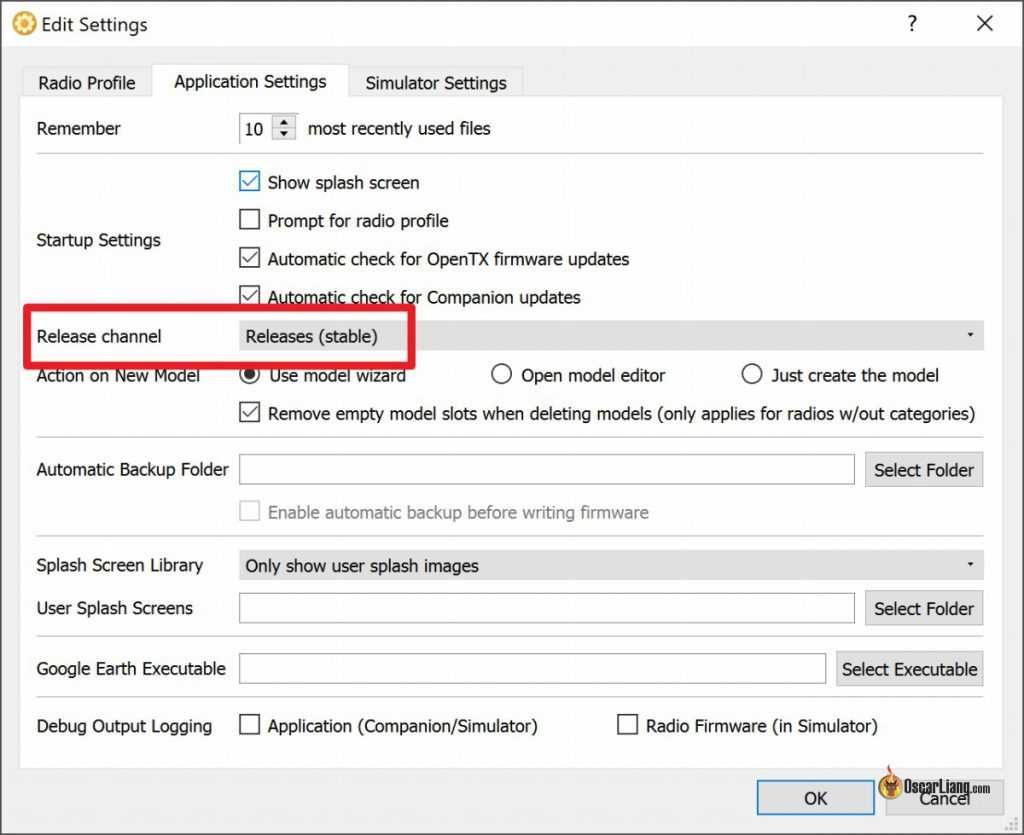
Go to Edit Settings, and select the options you want. I explained these options in .
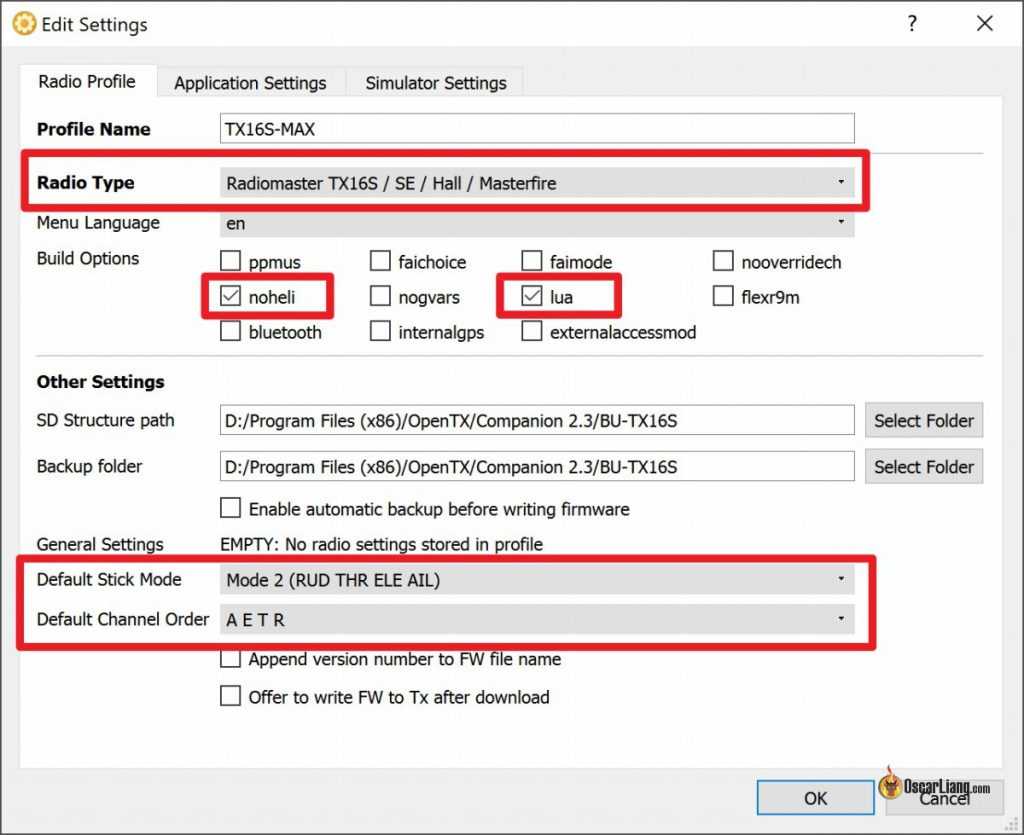 Make sure you have Release (stable) selected in Release Channel so you are not downloading the Nightly build.
Click the “Download” button on the left, and click “Check for updates” on the pop up window, “Latest Download Version 2.3.xx” should appear. Download firmware and save it somewhere.

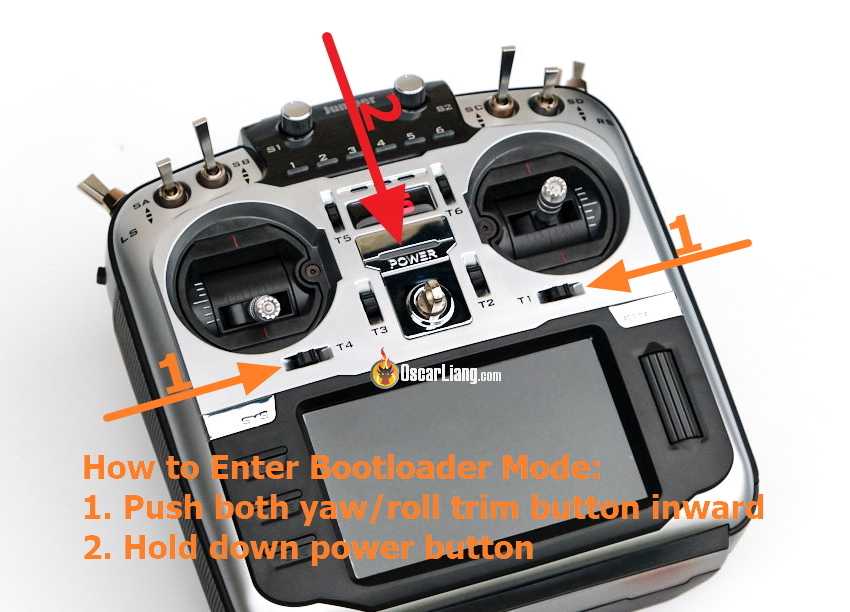
Put your radio in bootloader mode.
Click on the button “Flash firmware to radio” on the sidebar, load the firmware we just downloaded and click “Write to TX“.
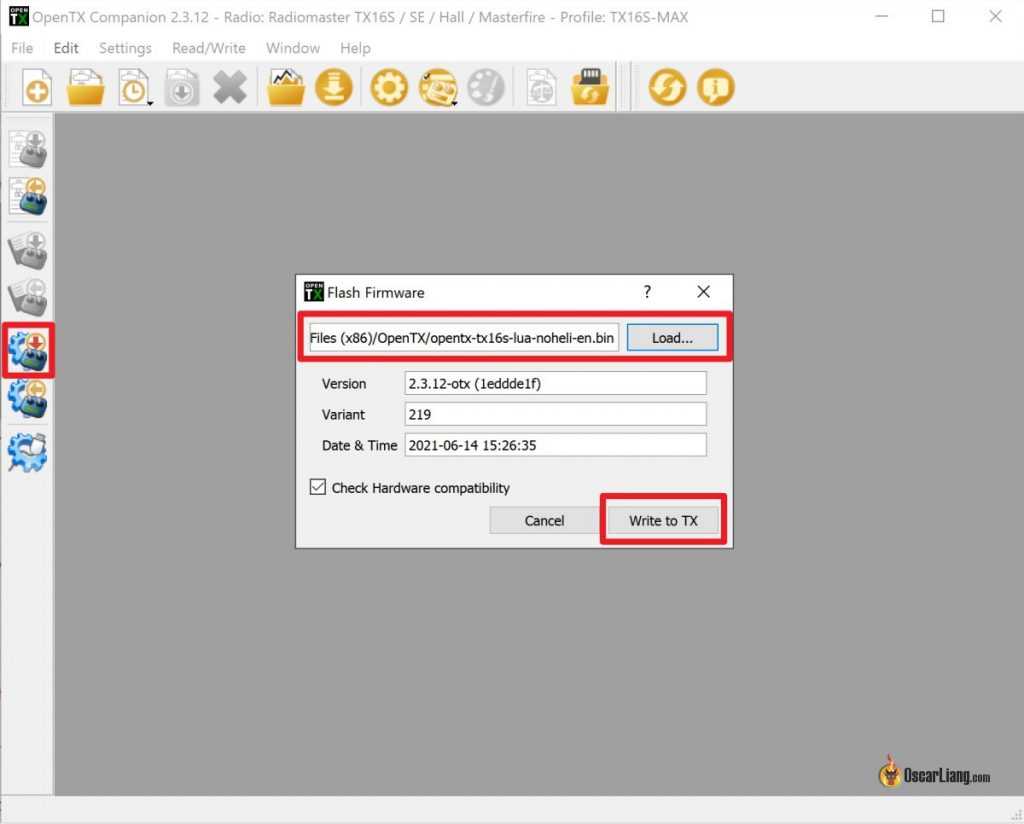
When flashing is done, unplug USB cable and restart your radio.
If you also get an “SD card content” warning, you should download the new SD Card content here (find the link for your radio, and get the latest file): https://downloads.open-tx.org/2.3/release/sdcard/
Make a backup of your current SD card content first.
Once downloaded the SD card content, plug in the USB cable to your TX16S, and select “USB Storage” to access the SD card inside the radio (or you can just take it out of the radio). Copy the files over to your SD card. If you don’t see the prompted window when you plug in the USB cable, See this post, you should sett that option to “ASK”.
ExpressLRS 2.4GHz Hardware Selection
All transmitters and receivers with ExpressLRS firmware are compatible regardless the brand.
Radios with Built-in ELRS
Getting a radio with an internal ELRS module means you don’t need to spend extra for an external module.
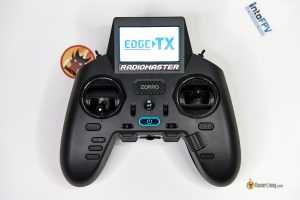
| TX16S MKII | Zorro | TX12 MKII |
 |
 |
 |
| BanggoodGetFPVRDQ | BanggoodGetFPVRadiomaster | BanggoodAliExpressRadiomaster |
| Lite Radio 3 | T-Pro | T-Lite V2 |
 |
 |
 |
| BanggoodBetaFPVRDQ | BanggoodAmazonRDQ | BanggoodAliExpress |
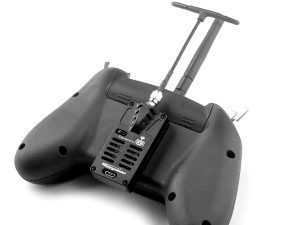
Transmitter Module
There are so many options when it comes to transmitter module, it might seem difficult to choose. But really, they are all based on the same open source design by the ExpressLRS, the main difference is the build quality and certain features like screen, maximum output power and cooling. As long as you are getting one from a well established brand you should be fine.
| Full Size Module (JR) | ||
| Happymodel ESTX24 Pro TX | BetaFPV ELRS Micro TX | AxisFlying Thor |
 |
 |
 |
| BanggoodGetFPVRDQ | BetaFPVBanggood | BanggoodGetFPV |
Other full size module options:
- HGLRC Hermes: https://oscarliang.com/product-jssq
- HiYOUNGER ELRS 2.4GHz: https://oscarliang.com/product-58mr
- Namimno Flash: https://oscarliang.com/product-ie8s
- Happymodel ES24TX: https://oscarliang.com/product-a3r9
| Lite Module | ||
| Happymodel ESTX24-Lite TX | BetaFPV ELRS Nano TX | Jumper AION |
 |
 |
 |
| RDQBanggoodAliExpress | BetaFPVBanggood | RDQ |
Other lite module options:
- FrSky VANTAC: https://oscarliang.com/product-50wh
- Happymodel ES24TX Slim Pro: https://oscarliang.com/product-xi1z
The TX module plugs into the external JR module bay, and it’s compatible with radios such as Radiomaster TX16S, Jumper T16, and Frsky X9D+. For smaller radios such as the Jumper T-Lite and TBS Tango 2, you will need the “Lite style” module as the module bay is smaller.
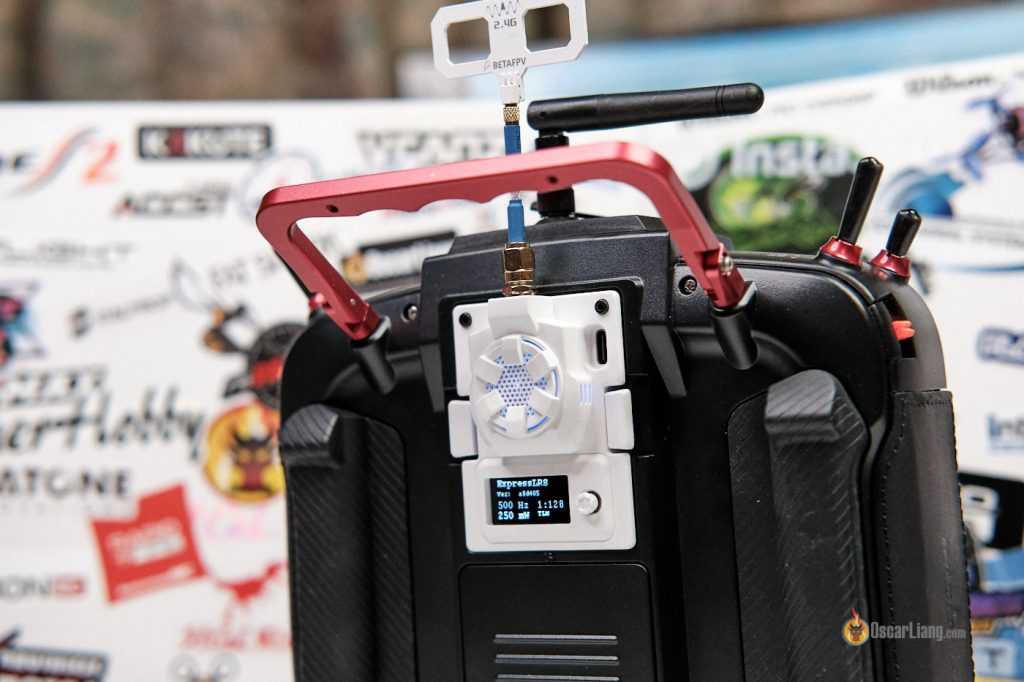
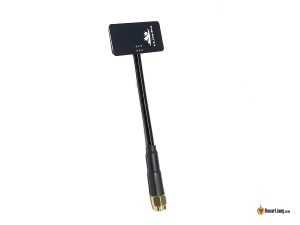
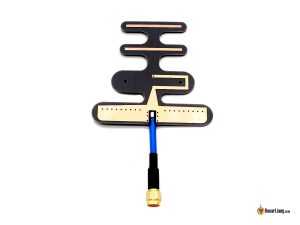
TX Antenna Upgrades
Stock antenna works fine, but if you are trying to push range you can try these higher gain antennas:
| HappyModel Moxon (4.2dB) | Namimno Black Pearl Loop (2.8dB) | BetaFPV Moxon (5.6dB) |
 |
 |
 |
| BanggoodGetFPVRDQ | Banggood | BetaFPV |
| VAS Diamond (2.8dB) | TrueRC True-MOX (2.1dB) | Turbowing Fishbone (7.5dB) |
 |
 |
 |
| GetFPVRDQ | GetFPVRDQ | Banggood |
Receivers
| Radiomaster RP1 | Radiomaster RP2 | x |
 |
 |
x |
| RadiomasterBanggood | RadiomasterBanggood | x |
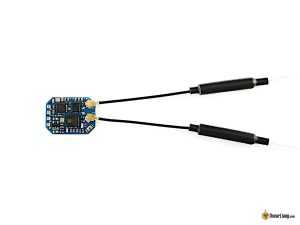
| BetaFPV Nano RX | BetaFPV Lite RX | Flywoo EL24E/P RX |
 |
 |
 |
| BetaFPVBanggood | BanggoodBetaFPV | RDQBanggood |
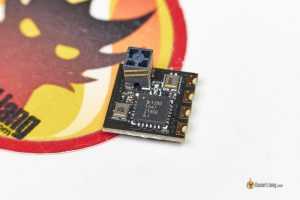
| Happymodel EP1 | Happymodel EP2 | Happymodel PP |
 |
 |
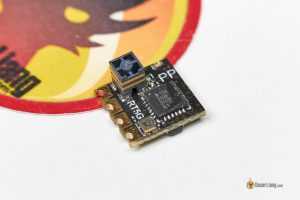 |
| RDQBanggoodAliExpress | BanggoodAliExpressRDQ | GetFPVAliExpress |
Diversity Receivers
| Skystars ELRS Diversity | MATEKSYS ELRS R24 D Diversity | x |
 |
 |
x |
| AliExpress | BanggoodGetFPV | x |
Other receiver options:
- HGLRC Hermes: https://oscarliang.com/product-vsrn
- JHEMCU RX24T (has PA/LNA amplifier capable of transmitting telemetry data with 100mW, good for long range): https://oscarliang.com/product-x2xp
- JHEMCU SP24S (almost identical to EP1): https://oscarliang.com/product-srb0
- Matek ELRS-R24-P PWM receiver: https://oscarliang.com/product-hx8m
- BetaFPV PWM Micro receiver: https://oscarliang.com/product-lfid
- AxisFlying ELRS Receiver: https://oscarliang.com/product-jaxm
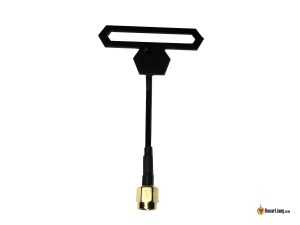
RX Antenna Replacement
- BetaFPV Dipole T Antenna: https://oscarliang.com/product-o5vm
- Radiomaster T Antenna: https://oscarliang.com/product-r4t0
All the ExpressLRS receivers and transmitter modules are cross-compatible, so it doesn’t matter which brand you get your hardware from they will work together. They are all based on the same ELRS open source design, the main differences between these receivers are:
- Build quality
- Size
- WiFi Support (for firmware update and configuration)
- Antenna (some have built-in low profile ceramic antenna, while some comes with U.FL connector for longer external antenna)
Size comparison to TBS Crossfire Nano and Frsky R-XSR:
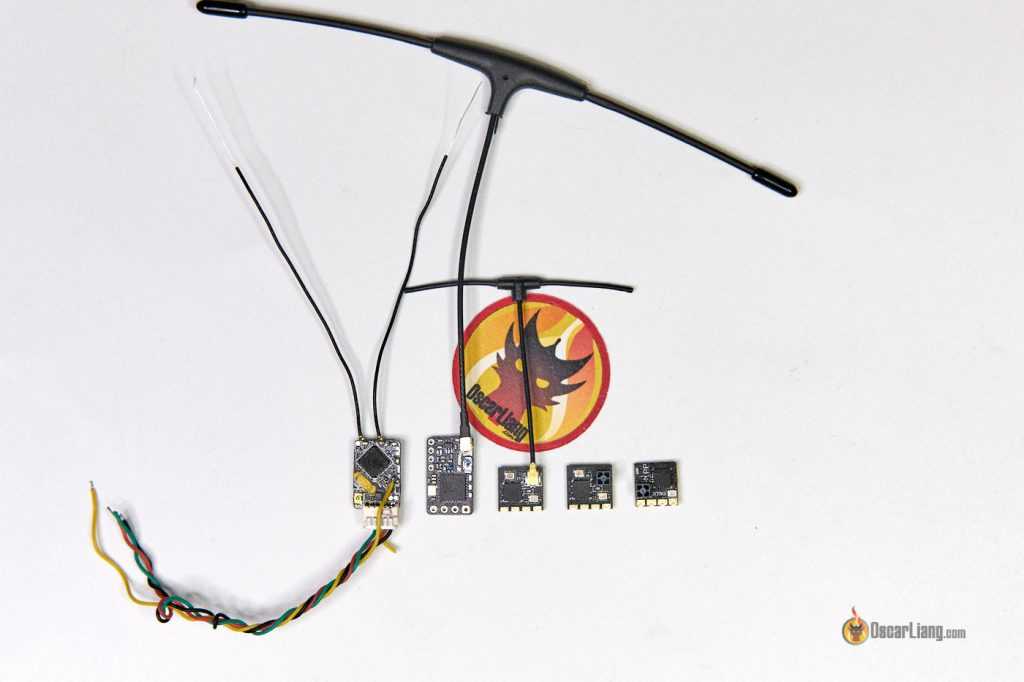
Size comparison: Frsky R-XSR, Crossfire Nano, EP1, EP2, PP
Where Engine Power Comes From
What powers those pistons up and down are thousands of tiny controlled explosions occurring each minute, created by mixing fuel with oxygen and igniting the mixture. Each time the fuel ignites is called the combustion, or power, stroke. The heat and expanding gases from this miniexplosion push the piston down in the cylinder.
Almost all of today’s internal-combustion engines (to keep it simple, we’ll focus on gasoline powerplants here) are of the four-stroke variety. Beyond the combustion stroke, which pushes the piston down from the top of the cylinder, there are three other strokes: intake, compression, and exhaust.
Engines need air (namely oxygen) to burn fuel. During the intake stroke, valves open to allow the piston to act like a syringe as it moves downward, drawing in ambient air through the engine’s intake system. When the piston reaches the bottom of its stroke, the intake valves close, effectively sealing the cylinder for the compression stroke, which is in the opposite direction as the intake stroke. The upward movement of the piston compresses the intake charge.
Solutions to Commonly Reported Issues
The following list of solutions solves most reported issues on our Discord support channel.
Please try these before reporting any other issue on Discord.
Remove Old Marketplace Installation
Remove Old Marketplace Installation
Affected versions: Stable, Development
If you have the following issues you are most likely on an outdated stable or you have an installation conflict:
- Invisible Aircraft
- Infinite loading times
- White EFB screen
- PFD is missing bank angle protection indicators
- MCDU error
- External lights are not working
Double install of the add-on and conflict with very old, unsupported versions.
Go to your content manager and filter for «flybywire» as you see on the following image.
If you see old versions (e.g. v0.6.1) or if you have multiple installations of the A32NX please uninstall them in the Content Manager and restart the sim. Reinstall development version from our installer.


![Drift streets japan [v.29.01.16] (2015) [pc игры, racing] / скачать бесплатно](https://tuningstylespb.ru/wp-content/uploads/7/3/4/7346182d48eb5744ca2020d125532cde.jpeg)

Information on how to install with the FlyByWire Installer can be found here: Installation Guide.
Use the Latest Version of MS Flight Simulator
Use the Latest Version of the A32NX Add-on
Use the Latest Version of the A32NX Add-on
The A32NX is constant being improved and extended. New features, changed features, and bug fixes are constantly
being added. Because of this it is important to make sure that you have the latest version of the A32NX add-on.
The latest fixes and features are available in the Development version of the add-on.
Use our Installer to check availability of new updates and keep your installation as current as possible.
Clean Install
Enable Windows UTF8 Support
Test With Only the A32NX Add-on in Community
Test With Only the A32NX Add-on in Community
This is the most important troubleshooting step for Microsoft Flight Simulator!!
To make sure the issue you are experiencing is not caused by a conflict with other add-ons or liveries
*remove everything (really everything!) from your and perform
a of the A32NX with the
FlyByWire Installer.
An easy way to do this without deleting your add-ons and liveries is to rename the current Community folder to
«Community.old» and then create a new Community folder which then empty. You can the use the FlyByWire Installer
to reinstall the A32NX.
Use the Correct Airframe for SimBrief
Turn Off All MS Flight Simulator Assistance Features
Throttle Calibration
Check your MSFS Uses the Correct Community Folder
Setup Your Controller Deadzones
Setup Your Controller Deadzones
In certain situations your hardware maybe causing unwanted inputs when attempting to fly the aircraft. Increasing the deadzone setting for your controller can help prevent these inputs.
- Go to your settings
- Controls and select your yoke/joystick/controller.
- After that click the sensitivity button on the top left which should take you to the menu where you can adjust
your deadzones.
Start with 20% deadzone, if the problem persists keep increasing it. If it’s fine with 20% you can then slowly
decrease it too.
Understand Discontinuities
Sync MSFS Flight Plan with the A32NX Flight Plan
Cockpit Interaction System
Cockpit Interaction System
Affected versions: Stable, Development
Switches, knobs and dials can’t be used with simple mouse clicks as before.
Controls appear highlighted in color (mostly blue) when the mouse hovers over them.
Asobo
We recommend the legacy (previous) method of the Cockpit Interaction System:
- Go to Menu
- General Options
- Accessibility
- Find the setting
- Change to
Using New Cockpit Interaction System
- Highlight a control (like a knob).
- Hold Left Click to lock to that control. Now your mouse will not affect any other controls or other mouse bindings.
- Move the mouse left to turn the knob left, move it right to turn the knob right (with the Left Click held down)
- You can also use the scroll wheel while holding Left Click down to turn the knob left or right.
- To push a control / knob in, lock to the control using Left Click and then Right Click.
- To pull a control / knob out, hold Left Click and then click your scroll wheel Middle Mouse
Note: If you already use the Middle Mouse button to activate freelook this may not work. Check your keybinds so this feature does not conflict.
.
This list is based on our testing and feedback. For more information see the MSFS Release Notes — Cockpit Interactions.
Direct your support questions and feedback of this feature to Asobo.
Do Not Use DX12
Disconnect the Tug
Disconnect the Tug
If you have the «NW STRG DISC» message on the upper ECAM display but you can’t see a tug, please press
Shift+P on your keyboard to disconnect the invisible pushback tug.
This is an MSFS issue sometimes triggered by pushback tools like Toolbar Pushback Add-on and the flyPad pushback
system.
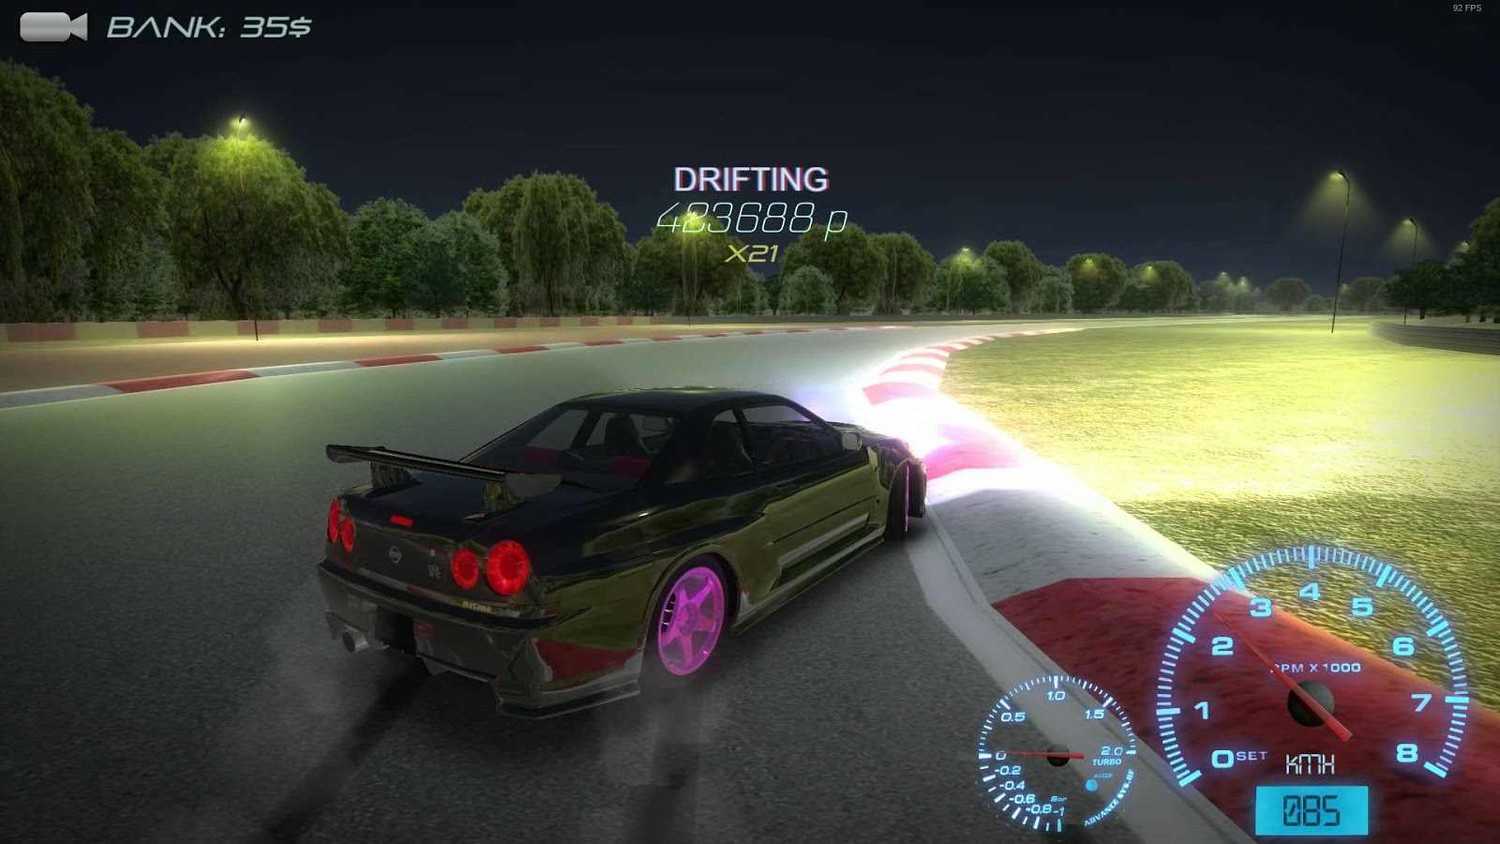
CarX Drift Racing Online
- Издатель: CarX Technologies, LLC
- Разработчик: CarX Technologies, LLC
- Дата выхода: 17 ноября, 2017
 Управляемый дрифт под любым углом
Одна из наиболее совершенных дрифт-аркад, позволяющая раскрыть возможности машины в полной мере. Выбирайте эффектные реалистичные автомобили, настраивайте и врывайтесь на живописные трассы. Игрокам предлагается несколько площадок для отрабатывания навыков вождения, а затем предстоит участвовать в заездах против других гонщиков. Геймплей предлагает немало нюансов, среди которых выделяются:
- Более 10 трасс, включая городские дороги и специальные треки;
- 30 автомобилей;
- Гибкая система настроек;
- Победа зависит только от опыта и сноровки.
Физика в игре приближена к реальной, но разработчики предусмотрели несколько допусков, позволяющих без лишних сложностей пускать машины в дрифт под невообразимыми углами. В этой игре невозможно создать уникальную комплектацию автомобиля под любые случаи, ведь трассы и манера ездить у каждого индивидуальные.
Hand Fist
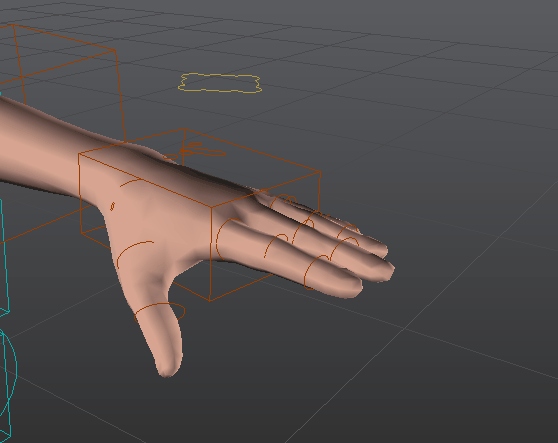
Optionally, you can add a fist controller on the hands. This controller is meant to blend the fingers into a pre-defined fist pose. This allows a better grasp than the default “Fingers Grasp” property since that simply curls the phalanges along the X axis, wich may be inacurrate.
-
Create a new action, its name must include “rig_fist” (for example “mycharacter_rig_fist”)
-
Keyframe the fingers controllers (rotate directly the fingers controllers, the Rotation From Scale can’t be used here) this way: frame 0 = rest pose, frame 10 = fist pose. Optionally, spread the fingers and keyframe them at frame -10.
-
Select the hand controller and click the Add Hand Fist button to generate the controller. Fingers will curl into the fist pose when scaling it.
-


Situating the ESP-C3
The ESP8266 started life as a simple AT-command-set WiFi modem, and a bunch of hackers proved that it had a lot more to offer. It’s sometimes hard to remember how difficult and expensive WiFi connectivity was before the ESP8266, but at the time, WiFi for $5 was revolutionary compared to WiFi for $50 – $100. Flash forward a few years, and the ESP32 is a competent microcontroller in its own right, with some cool quirky features. Oh yeah, and WiFi and BLE. We’ve come a long way in a very short time.
 The C3 is really a blend of the two: a limited number of GPIO pins like the ESP8266, but with nice peripherals like the ESP32. If it’s priced to compete with the ESP8266, it will push that chip into retirement. But maybe it’s time.
The ESP-IDF has grown on us, but it’s still nothing compared to the overabundance of examples for ESP-Arduino or the incredible ease of use of MicroPython. When the latter gets ported over to the ESP32-C3, with its significantly expanded memory over the ESP8266, that’ll be a tremendously inexpensive platform that will make many forsake ever compiling again. But when you need the speed of the native SDK, it’s nice to be able to lean on the extant ESP32 codebase, so an ESP8266 in ESP32’s clothing is a winner.
We’ve got pre-production samples, and Espressif is still working on supporting all the features of the ESP32-C3 in the IDF. Heck, you can’t buy an ESP32-C3 module yet anyway, so we’re stuck looking into our crystal ball a little bit. But the murmurs about pricing similarly to the ESP8266 make us take notice, and it’s certainly a worthy upgrade even at a small price premium, if that’s what the market will bear. At the same time, the ESP32-C3 is fundamentally less capable than the ESP32, so it’s got to come in cheaper than that. With ESP8266 dev boards selling for $2 and ESP32 dev boards selling for $4, that doesn’t leave much wiggle room, and we suspect some folks will just pony up for the ESP32s. So it’s hard to say how much the price really matters anyway.
But it’s nice to see RISC-V cores in more devices, not least because the standardized instruction set architecture — which essentially amounts to a standard set of machine-language commands — makes writing optimizing compilers easier and faster. For the end user, it doesn’t matter all that much, but if saving money on IP licensing fees is what allows Espressif to include a more modern peripheral set for the ESP8266 price, then we’re all for it.
Introduction
Japan’s real-world touge paradise of Mount Haruna in Gunma Prefecture inspired the stage in the late 90s for the most epic fictional street-racing battles the world has ever witnessed.
With the fictional ‘Mount Akina’ playing host to the closely contested races throughout the series, the epic tight and twisty mountain touge roads based on the Kantō region of Honshu became the perfect choice for one of the most iconic series’ ever to reach TV screens — Initial D.
Although the anime series became the ultimate choice for JDM fans worldwide, Initial D’s initial introduction to the masses arrived through manga comics.
Providing an in-depth and insightful look at Japan’s underground street racing and tuning scene, which set the path for the anime series that followed, offering the perfect platform to avoid using actors, creating a unique perspective.
Although the anime series’ popularity would later inspire a Hong Kong action movie, it lacks the vibes that the original version supplied in abundance.
Many fans will remember the infamous street races, which were a fierce neck and neck battle right the way to the finish line, but the series offered so much more to its fans than just racing.
Some of the most recognizable names in the drifting world were contributing to Initial D behind the scenes.
With the likes of Japanese drifting and Toyota 86 legend, “Drift King” Keiichi Tsuchiya on-board, he would play a significant role as technical director in the early stages of Initial D’s creation.
Keiichi’s role would be to ensure that the series’s technical aspects were accurate, right the way down to each car’s movements as they slide their way up the touge with pinpoint precision.
Given that Tsuchiya is often best-known for his drift bible series, there’s arguably no better man for the job in understanding the specific elements of car control.
Initial D isn’t certainly isn’t your basic cartoon with a modified AE86 driving up a mountain. The creators were undoubtedly huge touge racing enthusiasts.
Thankfully, this provided the fans a tremendous amount of knowledge by watching the series, thanks to its profound understanding of technical aspects such as engines, differentials, and turbos.
While many drifting fans were initially hooked by the likes of The Fast and the Furious, there’s no bizarre *DANGER TO MANIFOLD* warnings here — thankfully!
Gone are the neon lights and fake car builds; you’ll only need to bring your best stock or lightly-modified setup and talent to compete with the best.
After reaching the mainstream for the first time in 1995 with the early manga comics, everyone’s favorite tofu delivery driver, Takumi Fujiwara, continued to capture the hearts of the ever-growing worldwide fanbase.
The manga series was written and illustrated by Shuchi Shigeno for the Weekly Young Magazine from 1995; this would later span across 48 tankōbon volumes published by Kodansha Comics before becoming the hugely popular hit TV show.
If you’ve never sat down and watched an entire series, or perhaps even an episode of Initial D, we highly advise doing so. It’s a must-watch for enthusiasts of drifting or the JDM car culture.
Much to the fans’ disappointment, Initial D’s final episode would later conclude production in 2013.
Thankfully, Takumi’s legacy continues to live on in the present day.
For that reason, we’re bringing this guide with everything you could need to know about his AE86 (Eight-Six, or Hachi-Roku,) which made the old-school-cool Toyota achieve a worldwide cult following.
Colin McRae Rally 3 (2003)
Colin McRae Rally 3 — отличный подарок фанатам реалестичных спортивных симуляторов. Реалестично реализованы физические модели машин. Движок позволяет передать все мелочи физики автомобиля при прохождении сложных поворотов и наборе скоростей. В игре предаставлены несколько моделей автомобилей. Каждый обладает собственным набором технически …
Год выпуска: 2003Жанр: racingРазработчик: CodemastersИздательство: CodemastersСайт разработчика: http://www.codemasters.com/colinmcrae3Язык интерфейса: русский и английскийПлатформа: PCМинимальные системные требования: CPU:AMD Duron 800+/Intel Pentium 3 800 Mhz RAM:128 512 VideoCard: nVida GeForce 2 MX/ATI Radeon 7xxx
Игровой процесс
Геймплей игры схож с подобными гоночными симуляторами. Здесь все довольно понятно и просто. Вы выбираете себе автомобиль из доступных, затем участвуете в соревнованиях, побеждаете противников, совершенствуете машину или покупаете новую за заработанные деньги. Советуем попробовать поиграть в мультиплеер или онлайн-игру. Эти два режима сделаны в игре просто великолепно. Приглашайте друзей, приятелей, знакомых, и принимайтесь участвовать в гонках самого высшего разряда. Начните свою карьеру автогонщика прямо сейчас. Победите всех именитых и великолепных профессионалов, которые списывают вас со счетов раньше времени. Открывайте автомобили и трассы по мере прохождения, а также пользуйтесь уникальными бонусами, которые преподносит вам игра.
Drift Streets Japan скачать торрент на русском бесплатно в последней версии вы можете ниже по прямой ссылке.
Display LQ and RSSI in OSD
Further Reading: What are LQ and RSSI?
In a nutshell:
- RSSI – Signal strength, how loud the signal is (value from -130dBm to 0dBm)
- LQ – Link Quality, how well your receiver can understand the signal (value from 100% to 0%)
Both indicators are useful, but if you have to pick one, LQ is probably more important.
To display LQ properly you should use Betaflight 4.2 or newer, where they introduced a new RFMD:LQ% format for the LQ OSD element.
- Configuration tab, Disable RSSI_ADC
- Receiver tab, set RSSI Channel to Disable
- OSD tab, enable Link Quality and RSSI in dBm
It’s useful to have both measurements. For example:
- low LQ, high RSSI = lots of interference around you
- high LQ, low RSSI = you are very far away and should be cautious, or if you are close that’s an indicator that maybe something is wrong with your antennas
- low LQ, low RSSI = reaching the range limit of your gear
Drift Streets Japan вылетает. В определенный или случайный момент. Решение
Играете вы себе, играете и тут — бац! — все гаснет, и вот уже перед вами рабочий стол без какого-либо намека на игру. Почему так происходит? Для решения проблемы стоит попробовать разобраться, какой характер имеет проблема.
Если вылет происходит в случайный момент времени без какой-то закономерности, то с вероятностью в 99% можно сказать, что это ошибка самой игры. В таком случае исправить что-то очень трудно, и лучше всего просто отложить Drift Streets Japan в сторону и дождаться патча.
Однако если вы точно знаете, в какие моменты происходит вылет, то можно и продолжить игру, избегая ситуаций, которые провоцируют сбой.
Однако если вы точно знаете, в какие моменты происходит вылет, то можно и продолжить игру, избегая ситуаций, которые провоцируют сбой. Кроме того, можно скачать сохранение Drift Streets Japan в нашем файловом архиве и обойти место вылета.
Additional Receiver Settings
There are more settings when you connect to the receiver via WiFi (on the page where you flash RX firmware).
First, power on the receiver and wait until it goes into WiFi hotspot mode. It does it automatically after being powered for 60 seconds by default (LED flashing rapidly when it’s in WiFi mode). Or you can also force the receiver to go into WiFi mode in the radio’s LUA script.


![Drift streets japan [v.29.01.16] (2015)](https://tuningstylespb.ru/wp-content/uploads/e/6/2/e62cd868024b3cc31645a02e546a9961.jpeg)

Now, connect to the WiFi network (the WiFi password is: expresslrs). In your browser, go to 10.0.0.1
On this page, scroll down and you will find the additional settings like Model Match. For PWM receivers, you will also have settings like PWM Output and Failsafe Positions for each channel, and the option to invert the channel outputs. These setting are not yet available in the LUA script.
Drift Streets Japan выдает ошибку об отсутствии DLL-файла. Решение
Как правило, проблемы, связанные с отсутствием DLL-библиотек, возникают при запуске Drift Streets Japan, однако иногда игра может обращаться к определенным DLL в процессе и, не найдя их, вылетать самым наглым образом.
Чтобы исправить эту ошибку, нужно найти необходимую библиотеку DLL и установить ее в систему. Проще всего сделать это с помощью программы DLL-fixer, которая сканирует систему и помогает быстро найти недостающие библиотеки.
Если ваша проблема оказалась более специфической или же способ, изложенный в данной статье, не помог, то вы можете спросить у других пользователей в нашей рубрике «Вопросы и ответы». Они оперативно помогут вам!
Благодарим за внимание!
FAQ
Receiver Update Warning: ”Not enough data uploaded!“
If you try to flash firmware of a different target, and force update, you will get this error “Not enough data uploaded”.
It’s a bug/feature in ELRS 2.5 that prevents target changing. If you still want to go ahead and flash a different target, you first need to revert the RX firmware back to 2.0 (on the original target), then flash the different target you wish.
LUA script only shows “Connecting…”
That’s an indication of the ExpressLRS TX module is not talking to the LUA script
Possible causes of the problem:
- TX Module is installed, or is installed incorrectly (pins in the module bay are not making proper contact or broken)
- Maybe the TX module is in WiFi update mode, restart the radio and try again
- Make sure you have set RF protocol to CRSF
- If you are running OpenTX, make sure the version is not too old (it has to be 2.3.12 or after)
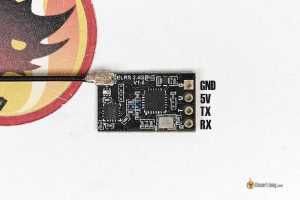
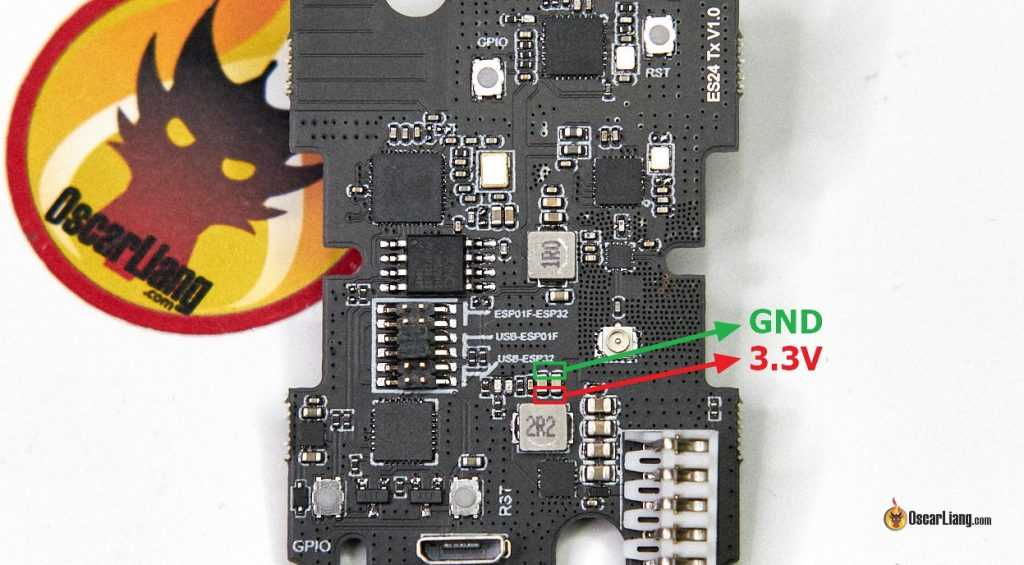
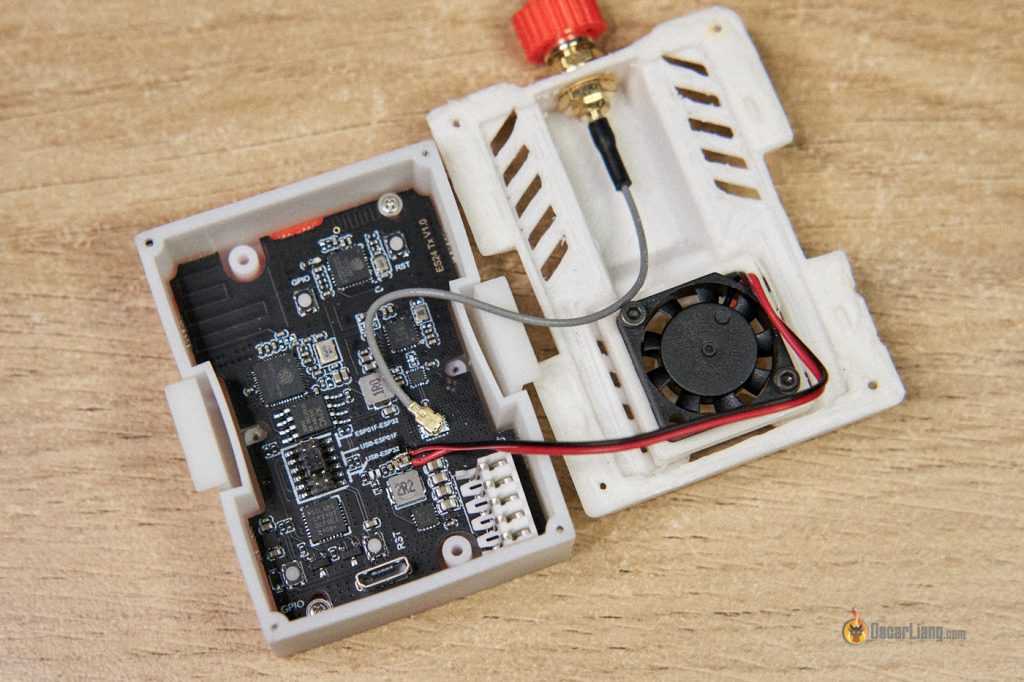
How to Install Cooling Fan
There is no fan plug for the Happymodel 2.4GHZ TX module, you need to solder it directly. I found 3.3V and GND at this capacitor. Make sure you confirm voltage with a multimeter before connecting to avoid damaging the board.
 I am using a 20x20x6mm 5v fan which fits perfectly in their new module cover. The fan can be bought on Amazon (affiliate link): https://amzn.to/3ixZpE0. The fan should act as an exhaust and take the hot air out, not blowing onto the PCB to avoid dust building up inside the module. Current draw is quite low so that shouldn’t be an issue. At 5V, 0.05A.
Inconsistent Packet Rate – CRSFShot Not Working
In the ELRS lua script top bar, there is an indicator (e.g. 0:200) which tells you how many packets per second it’s getting from the radio. You can use it to confirm the consistency of the RC link.
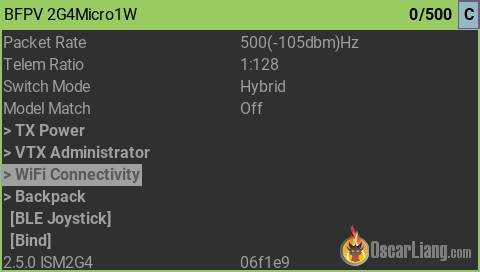
Ideally it should always show a stable number that is the same as the packet rate you select. For example: 0:50, 0:150, 0:250, 0:500.
If it shows an inconsistent number like 0:63, or is stuck at 0:250 at every packet rate you select, then your radio does not have CRSFShot working properly.
The latest official release of OpenTX (2.3.12 or newer) already includes CRSFShot, so double check if your OpenTX version is outdated.

I made a logo you can use as model image in the TX16S/T16. You can learn how to use it here.
Image download: google drive.
Install USB to UART Driver
You might or might not need to install this driver on your PC if you want to update your TX via UART: https://www.silabs.com/developers/usb-to-uart-bridge-vcp-drivers
Taranis QX7
For Taranis QX7 users, if you are running OpenTX, you’ll need to perform this mod in order to run 400k baud rate on your radio. It’s not needed, but it is recommended if you want to get the most out of ELRS: https://www.youtube.com/watch?v=mHfQe05XJn8&ab_channel=edrone
If you run EdgeTX you won’t need to do this mod as the bug has been addressed in software.
Betaflight LUA Script Support
ELRS does support Betaflight Lua script, all you need to do is to enable the “ENABLE_TELEMETRY” option when compiling/flashing firmware.


